
C-11-322 Orders Management: Using the SutureHealth Portal
👤 RESPONSIBLE POSITION | ROLE
Medical Records Specialist
🎯 PURPOSE
Some providers, including those belonging to the Curana Health Provider Group, utilize SutureHealth instead of a faxing system for documents needing provider signature, such as home health orders. This process outlines the steps needed to successfully and most efficiently send an order to the provider via SutureHealth and process the order once it is signed.
🔄 PROCESS
Part One: Send the Order to the Provider via SutureHealth
-
Every Curana Health provider should be set up in HCHB under the Delivery Type F-Other. This will route the document to Mosai but stop the document from being sent via fax. The document will load in Mosai as a case but will remain in Pending Delivery status until addressed.

- In Mosai, monitor documents under Pending Delivery status. When a document addressed to a Curana Provider arrives in Mosai, the document must be uploaded to SutureHealth to be sent to the provider.
-
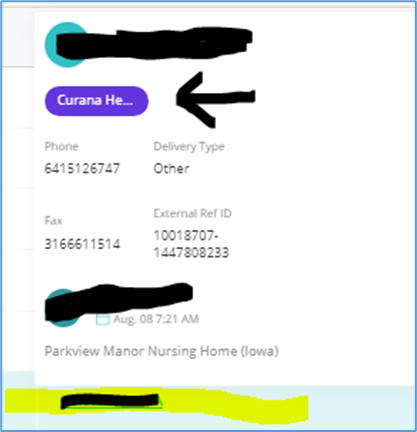
Confirm the addressed provider is a Curana Provider. Hovering over the provider’s name as listed on the case will show the provider information including Directory Tag.
-
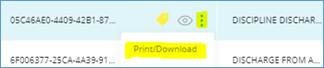
Click the ‘three dots’ button on the case and select Print/Download. The document will open in a new tab in the web browser.
-
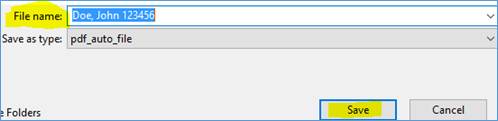
Select the download button. The Save As window will open.

- Save the document to this file location:
- 001-Corporate > Employee Folders > Medical Records > .Processes and Resources > .Curana Health Orders Management > 1. Unsigned Orders - Upload to Suture Health
-
When saving the document, label it with the client’s name and order number.
- In SutureHealth, upload the document to be sent to the provider, completing required fields:
- Under Template, select a template type.
- Select Certification for an initial 485/POC (from a Start of Care)
- Select RECERT 485 for a recertifying 485 (from a Recertification)
- Select Interim Order for a non-485 order.
- Search for and select the addressed provider.
-
You may need to select Expand beyond your state to find the addressed provider (if they are not in MN).

-
- The Location and Assistant fields will auto-fill.
- Select the Patient by searching for the patient’s name.
- Under Template, select a template type.
- If this is the first time you are uploading a document to SutureHealth for that specific client, you will need to add the Patient to their database. In that case, complete the following instructions here in step 8 (needed only once for each patient).
- NOTE: If the client is already in the SutureHealth system, do not add the Patient again. Instead proceed to step 9.
-
Select Add Patient.

- Within the new window complete only required fields.
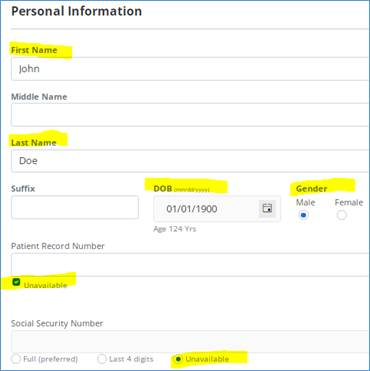
- Under Personal Information, the required fields are:
- First Name
- Last Name
- DOB
- Gender
- Under Personal Information, the required fields are:
-
Select Unavailable under Patient Record Number & SSN.
-
When you select Unavailable under Social Security Number, you will receive a warning pop-up window. Select OK and proceed with next steps.

-
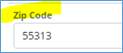
Under the Address section, only enter the Zip Code.
-
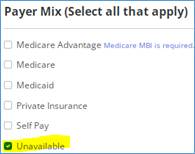
Under the Payer Mix section, select Unavailable.
-
Select Add Patient. The patient’s name will populate in the Patient Field.

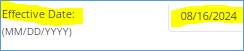
- Enter the Effective Date (if non-485) or Start of Care date (if 485).
-
Example of 485:

-
Example of non-485:
-
If non-485 order, the effective date is the order date found on the document:

-
If a 485, the SOC date is found on page 1:

-
-
Upload document by selecting Choose File.

-
After all fields are complete, click Send.

-
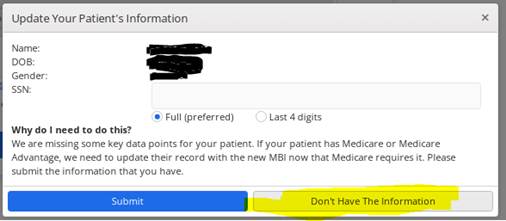
A pop-up will appear asking for the client’s Social Security Number. Bypass this by selecting Don’t Have the Information.
-
The document will now have uploaded to SutureHealth and can be visible under the Track tab under a status of Pending.

-
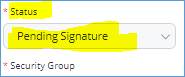
In Mosai, change the status of the document to Pending Signature, add the Uploaded to SutureHealth tag, and click Save in the lower right to save the changes to the case.
Part Two: Processing a Signed Order from SutureHealth
-
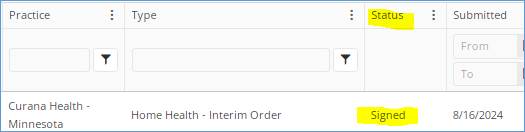
Navigate to the Track tab in SutureHealth.

-
If the status of an order is Signed, select the document. The document will open in a new tab.
-
Select the download icon in the upper right.

- Save the document to this file location:
- 001-Corporate > Employee Folders > Medical Records Specialists > .Curana Health Orders Management > 2. Signed Orders – Attach to Case in Mosai
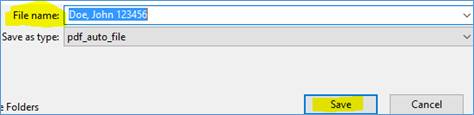
-
When saving the document, label it with the client’s name and order number.
- In SutureHealth, select the document and click Mark as Filed to mark the signed order as filed and move it to Archived status in SutureHealth.
-
In Mosai, upload the signed order into the Orders – ALL BRANCHES shared folder.

- In Mosai, attach the order to the case and process as any other inbound signed order.
📅 Effective: 12.26.2024 | 🛠️ Revised: 10.16.2026 | ✅ Approved: JFJ